For a long time, I barely gave my roof a second thought. It was just there, doing its job, keeping the rain and the sun out. But over the past few summers, I started noticing some problems! The upstairs rooms were always hotter than the rest of the house. The air felt heavy, stale, and hard to cool down. My energy bills crept higher, and every time I went into the attic, it felt like walking into a furnace!
I assumed this was just how houses worked in summer, until one day I was complaining about it to a friend, and he asked if I had any ventilation up there. That’s when I first heard about whirlybirds!
These simple, wind-powered devices can cool down our homes without power with no maintenance required. I was intrigued! It sounded too simple to make much of a difference. Still, I figured it was worth trying. So I bought one, installed it, and waited.
What happened next made me wish I had installed one sooner! This article is about that whole process: what led me to install a whirlybird, how it went, and why you probably need one too!
The Problems I Ignored for Way Too Long
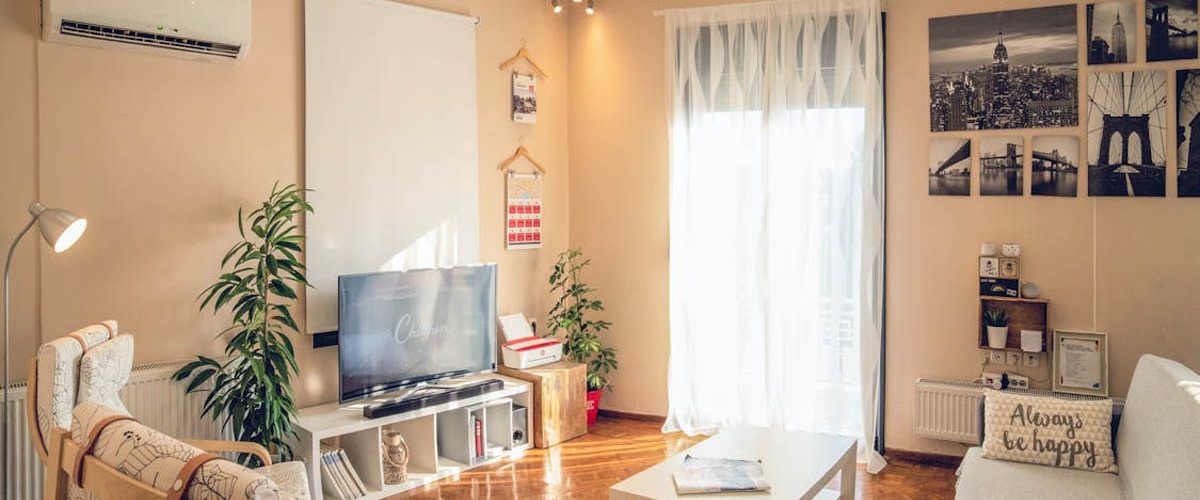
For years, I was experiencing issues in my home, but as I said, I just chalked it all up to how houses get in the summer. The upstairs was always the worst! Sticky air, constant heat, and a feeling like the walls were holding onto warmth long after the sun went down. I kept pushing my air conditioner harder, but it barely made a dent! Some nights, even with fans running full blast, sleeping upstairs felt impossible.
Worse than the heat, though, were the less visible problems. I started noticing patches of mould forming around the ceiling corners upstairs. Paint near the cornices began to bubble and peel. There was a persistent dampness that never quite went away, especially after rainy weeks. Even the clothes stored in our wardrobes felt musty, and the air felt stale.
The attic was the worst. It reeked of moisture and old timber. Every time I went up there, it felt both hot and damp, which shouldn’t go together! I later found out that the trapped heat was mixing with internal moisture, creating perfect conditions for mildew and condensation. And I’d ignored it all for years, not realising that a lack of simple ventilation was quietly damaging my home from the top down.
Thank goodness I learnt about whirlybird vents before my house suffered some irreparable damage!
What Even Is a Whirlybird?
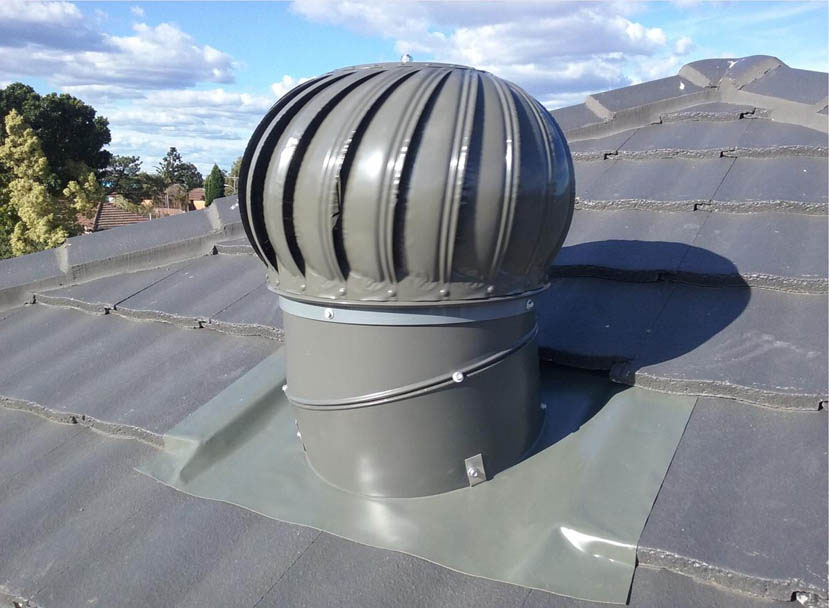
A whirlybird, also known as a turbine vent, is something you probably have seen thousands of times but never thought anything of it. Once my friend told me about them, I was like ‘Ahhh, so that’s what those things are for!’
It’s a small, dome-shaped vent that sits on your roof and spins in the wind. As it turns out, it draws hot, stale air out of your roof space, creating a steady flow that helps reduce heat, moisture, and humidity inside your home!
What makes it so effective is its simplicity. It doesn’t use electricity! There are no switches, wires, or complicated parts; all it needs is wind. As air inside your roof heats up, it rises and builds pressure. The spinning action of the whirlybird helps release that pressure by pulling the hot air out and allowing cooler air to flow in through any existing eave or soffit vents!
This process might sound insignificant, but over time, it makes a huge difference. It helps keep the internal temperature of your roof space lower, especially during summer, which can reduce strain on your air conditioning and minimise the risk of moisture buildup. It’s not high-tech or flashy, but it’s a surprisingly efficient way to help your house breathe properly and avoid long-term issues caused by trapped heat and humidity, as I soon found out!
Purchasing a Whirlybird

Once I decided to install a whirlybird, I was surprised at how many options were out there! I started by looking in my local hardware store, but also checked a few online suppliers to compare prices and reviews. Whirlybirds are fairly easy to find. Most major hardware chains stock them. But if you want a high-quality one or something more heavy-duty, go to a specialist roofing supplier!
What I quickly realised is that not all whirlybird vents are built the same. Some are made of lightweight aluminium, which is fine for most homes, while others are built from stainless steel or high-impact plastic, which is better for coastal areas or places with stronger winds. I looked for one with a solid warranty (at least 10 years) and bearings designed for quiet, long-term spinning. I didn’t want to hear it rattling every time the wind picked up!
Some models also claim to move more air than others, which mostly comes down to size and design. I settled on a high-quality model from this whirlybird vent supplier with good airflow capacity. If you’re unsure which one to get, you can ask in-store or read a few user reviews online! A decent whirlybird doesn’t need to break the bank, but it’s worth getting one that’ll last.
How I Installed My New Whirlybird Vent
Installing the whirlybird wasn’t overly complicated, but I took it seriously, especially when it came to safety. Working at heights isn’t something to take lightly, so before I even touched the roof, I made sure I had the right gear: a sturdy extension ladder with slip-resistant feet, proper footwear with good grip, and a safety harness anchored securely to a roof point. I also waited for a calm, dry day. I don’t want to risk battling the wind and wet tiles!
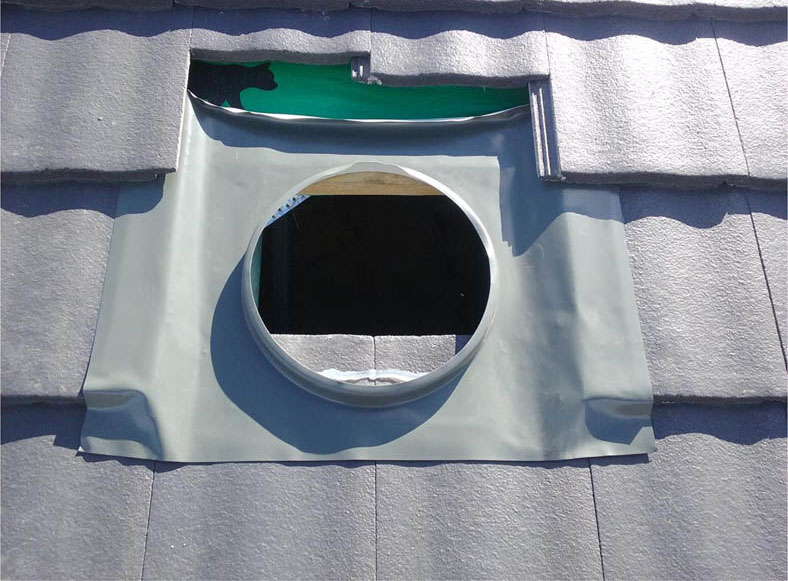
Once up there, I marked out the vent position. I positioned it near the peak of the roof, but not right at the ridge. That’s where it could extract the most hot air without compromising the roof’s structure. I used a template to trace the opening, then carefully cut through the roof sheeting using a jigsaw, making sure not to damage any rafters or battens underneath.
With the hole cut, I fitted the base of the whirlybird, sealed it with waterproof flashing and silicone, and screwed it securely into place. Then came the vent itself—attached, aligned, and ready to spin. I double-checked everything, came down slowly, and watched it catch the first bit of breeze. The whole process took a few hours, but doing it safely and correctly made all the difference!
What Changed After Installing a Whirlybird?
Not long after installing a whirlybird vent, I noticed a real change in how my home felt, especially upstairs. The bedrooms that used to trap heat during the day stayed noticeably cooler, even during those long stretches of dry, still weather! The attic, which had once felt like a slow-cooking oven, was bearable again. There was better airflow, no more heavy, stale air lingering up there, and most importantly, that strange, damp smell disappeared!
Within a couple of weeks, I saw signs that the moisture problems were easing. The small mould patches on the ceiling stopped growing, and I haven’t seen new ones since. No more paint bubbling, no more musty smell in the wardrobes. The air conditioning didn’t have to work nearly as hard, which meant my energy bills dropped, too! Not drastically, but enough to notice.
I didn’t need to repaint or run a dehumidifier, and I saved myself what could have easily turned into thousands in roof or ceiling repairs. What I initially thought might be a minor, maybe even pointless upgrade, turned out to be a fantastic solution and preventative fix to my house-related woes!
Why You Probably Need a Whirlybird Too!
If you’re dealing with a hot upstairs, musty smells, signs of mould, or a roof space that feels like it’s trying to cook itself from the inside out, chances are, poor ventilation is a big part of the problem. A whirlybird isn’t going to fix everything overnight, but it’s a simple, low-cost way to start addressing the issue before it gets worse.
They don’t need power, they’re easy to maintain, and they quietly get on with the job of moving hot, damp air out of your roof so cooler, drier air can take its place. Over time, that helps protect your ceiling, paint, insulation, and even the internal air quality in your home. Not to mention the knock-on effect on your energy bills once your air conditioner isn’t fighting a wall of trapped heat every afternoon!
If your house has a roof cavity and gets even mildly hot in summer, installing a whirlybird vent is a decision you’ll probably wish you made earlier. I know I do! Once I installed it, the difference was immediate and lasting. For something so small and unassuming, the impact was bigger than I expected. So, if your home is also suffering under the heat of the Australian sun, then why not try a whirlybird?